


Megan, our very talented guest designer for January and February, created the following how-to for all of us this week. This is such a fun technique, and we hope all of you enjoy it!
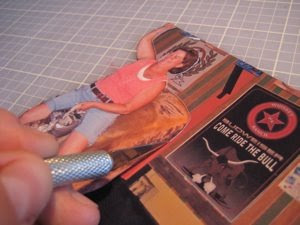
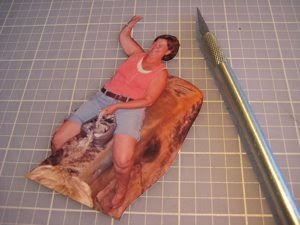
2) Take one copy of your photo and using the craft knife, carefully and precisely cut out the object you want to be 3D from the photo.
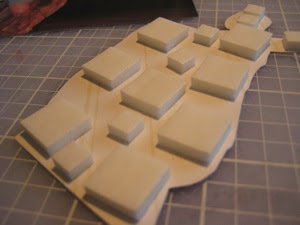
3) Back the cutout photo with foam adhesive.
4) Make sure all the backing is off of your foam adhesive and carefully place your cutout photo directly over it's mirror image in the uncut photo.
5) The result will be a 3D effect with the focal object coming out of the photo.

6) Use your photo on a layout!

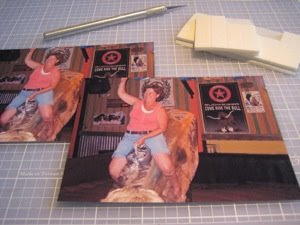
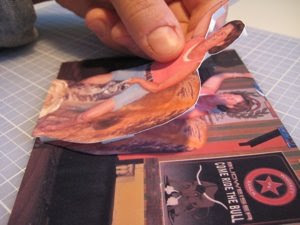
1) Gather your supplies: 2 identical copies of your photo, foam adhesive, craft knife and craft mat.

2) Take one copy of your photo and using the craft knife, carefully and precisely cut out the object you want to be 3D from the photo.


3) Back the cutout photo with foam adhesive.

4) Make sure all the backing is off of your foam adhesive and carefully place your cutout photo directly over it's mirror image in the uncut photo.

5) The result will be a 3D effect with the focal object coming out of the photo.


No comments:
Post a Comment